
5 Open Kitchen Design Ideas with Beautiful Cabinet Styles
Open Kitchens Need Beautiful Custom Cabinets Open kitchens give your home a fresh, connected, and modern look, and right cabinet […]
Open Kitchens Need Beautiful Custom Cabinets Open kitchens give your home a fresh, connected, and modern look, and right cabinet […]
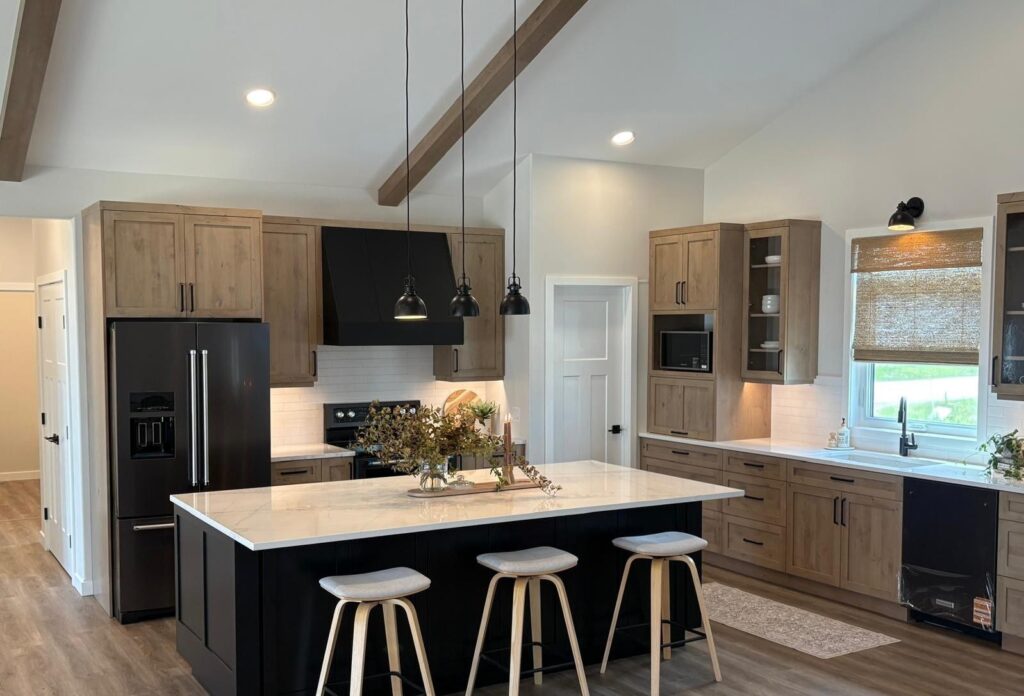
Sloped ceiling kitchen cabinets can be a challenge, but they also create an opportunity for a really unique design. A
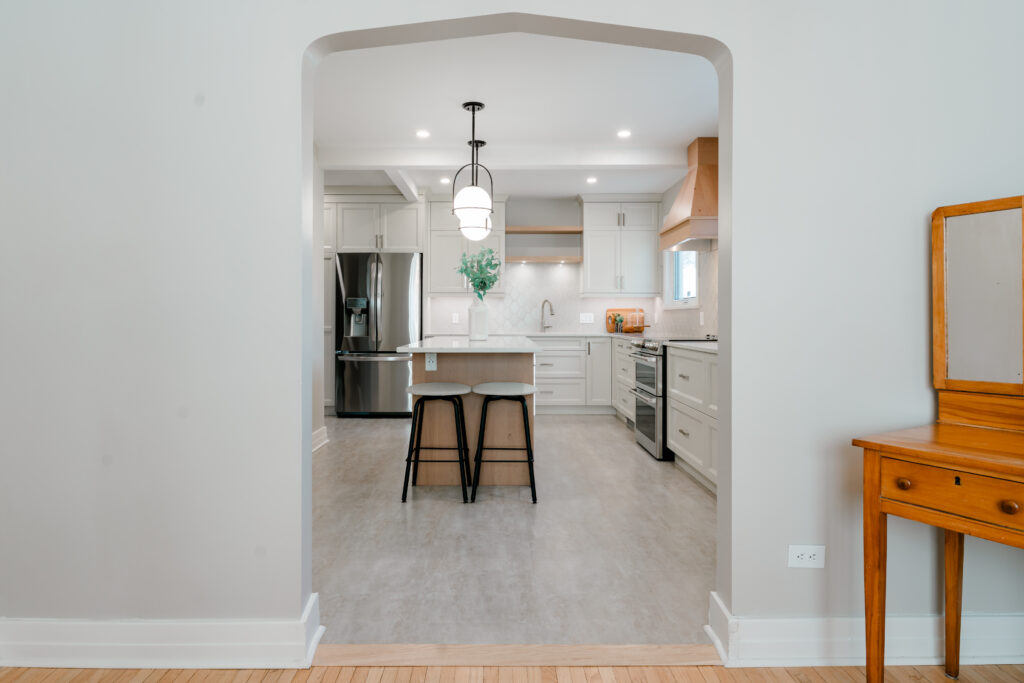
A kitchen with archway entryways changes how the kitchen connects to the rest of the home. Instead of a square

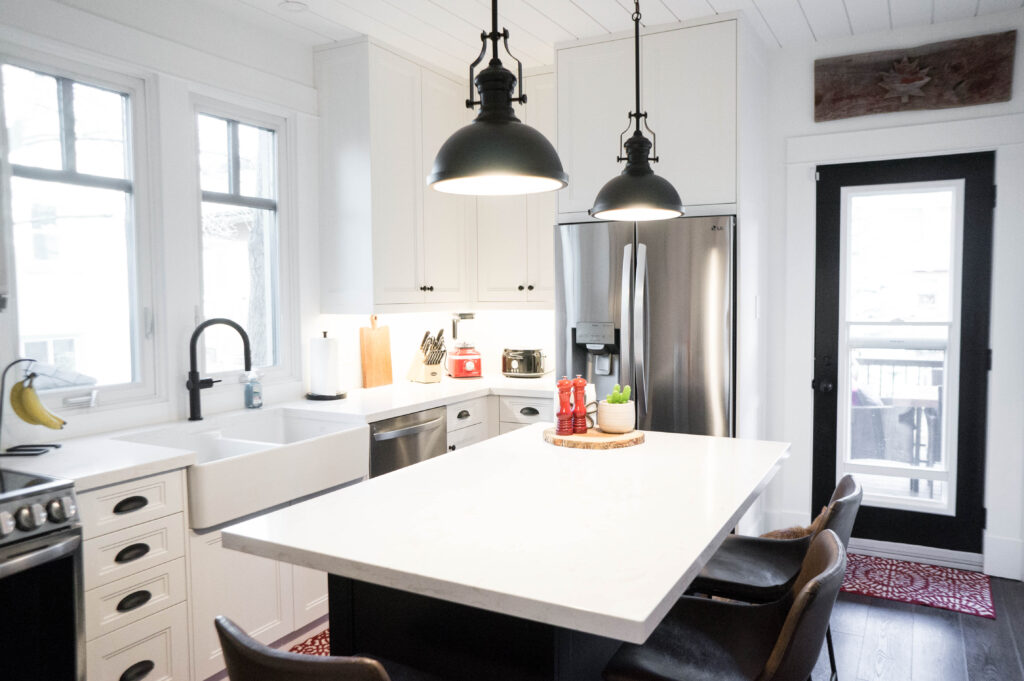
How do you add an island to a smaller kitchen without overwhelming the layout? The answer is often a kitchen
9 Window Ideas for a Well-Planned Kitchen These kitchen window ideas bring natural light into your space and are supported
Quad door fridges are an appliance style that is coming up in popularity. Here’s what you should know before your
Studio kitchen ideas make a small spaces usable and intentional. The kitchen shares space with living, dining, and sleeping areas,
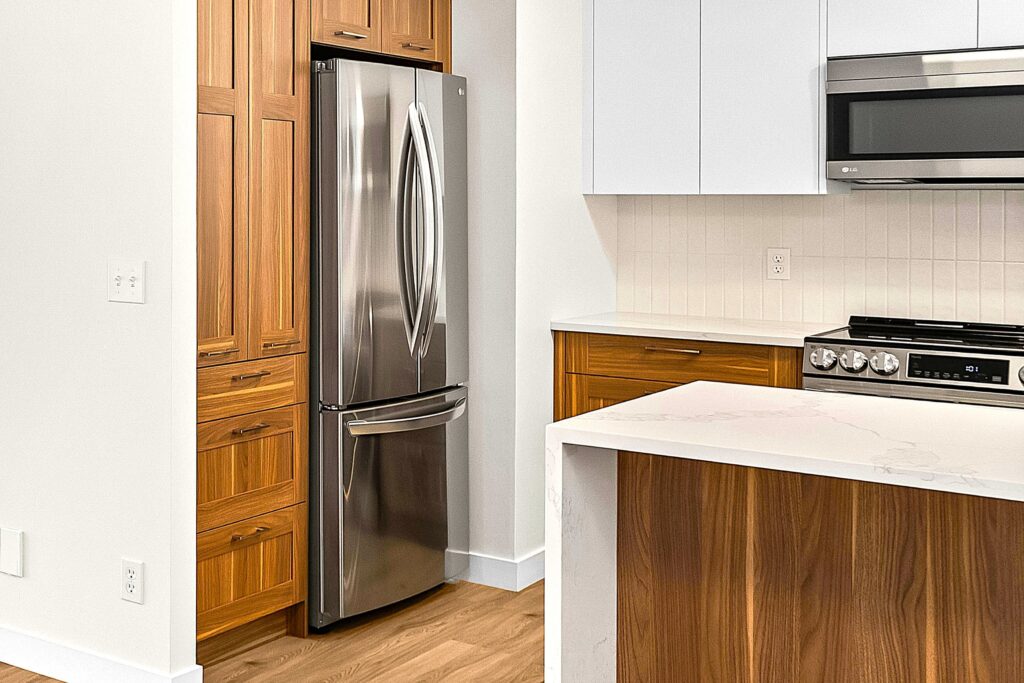
Struggling on where to put a pantry in a small kitchen renovation? Here’s what we recommend: Next to the fridge.
5 Basement Kitchen Ideas for Everyday A basement kitchen supports everyday living with room for snacks, drinks, and casual meals,
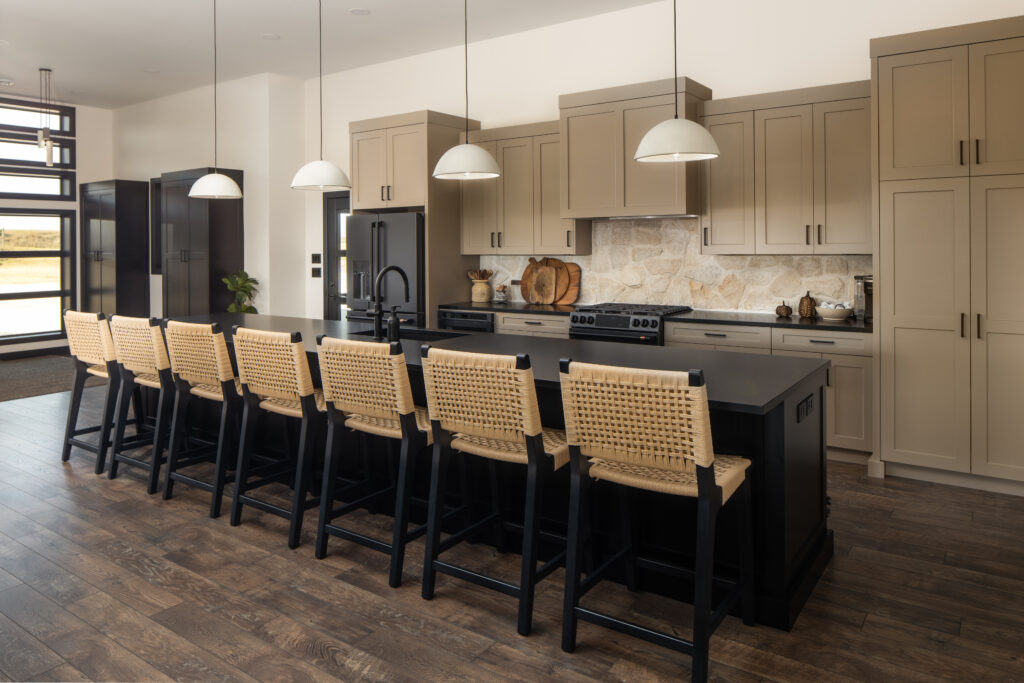
Looking for large kitchen island ideas? A large kitchen island with lots of seating changes how a kitchen works. It