Floating bathroom shelves are an open storage option while providing room for daily essentials, towels, and styling pieces. When planned well, they look intentional and support how the bathroom functions. When planned poorly, they feel cluttered or disconnected.
Here are some clear do’s and don’ts so your floating bathroom shelves look intentional and well styled.
Floating Bathroom Shelves: Do’s and Don’ts
Floating bathroom shelves work best when they are planned with the rest of the bathroom, supported correctly, and styled intentionally.
Do
- Plan placement early
- Allow even spacing between shelves
- Size the shelf correctly to the space
- Match shelf material to bathroom materials
- Choose a practical shelf depth
- Anchor shelves properly
- Add proportional storage and decor items
Don’t
- Add shelves without purpose
- Use materials not suited for moisture
- Overload shelves visually
- Ignore alignment with other elements
- Add too many or too few shelves for the space
Do’s for Floating Bathroom Shelves
Plan placement early
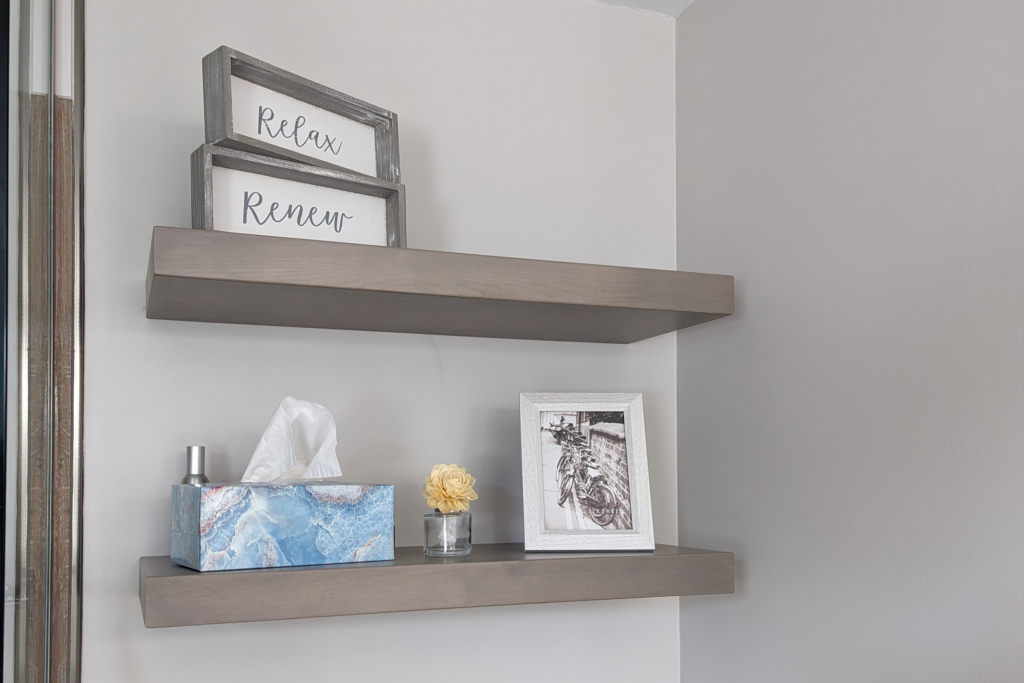
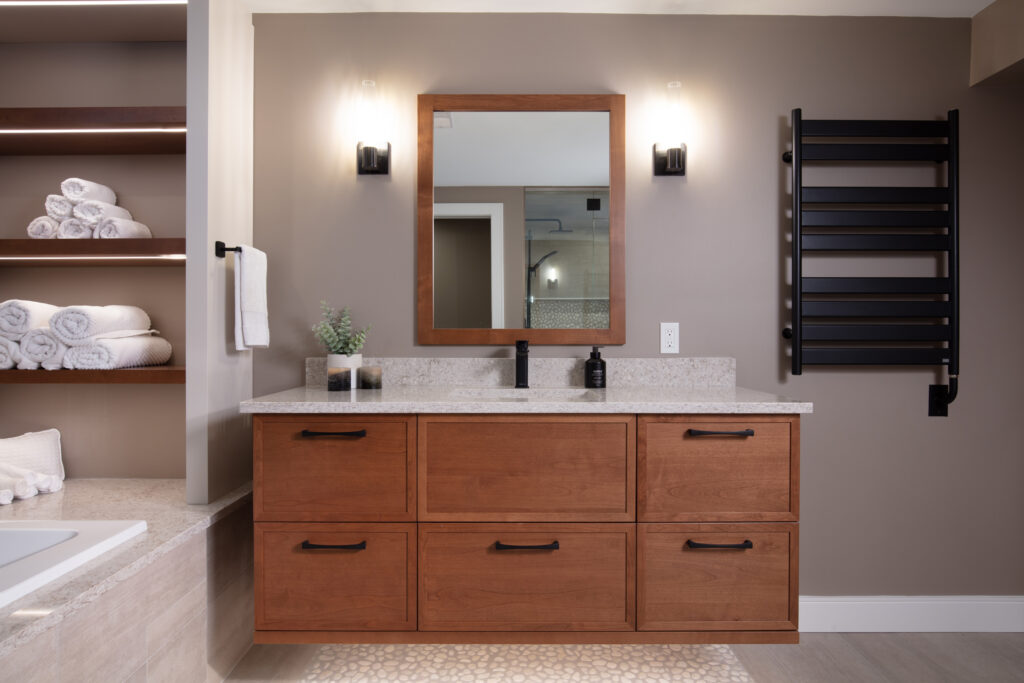
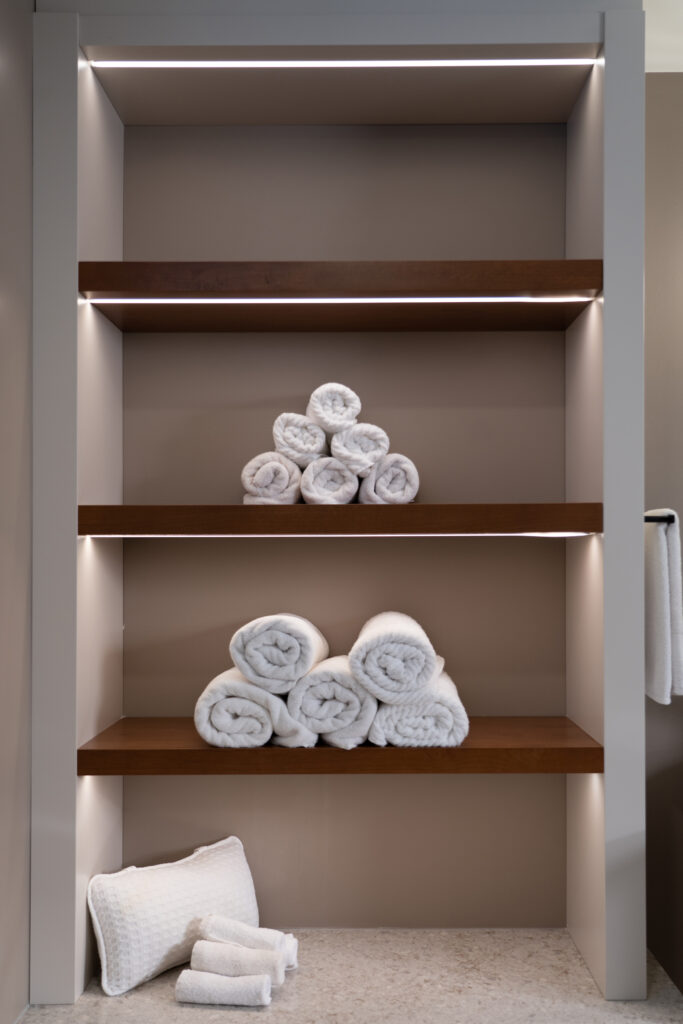
Floating bathroom shelves should be considered during the renovation process at the same time as the vanity, mirrors, and lighting. Early planning allows the shelves to align evenly with other elements and ensures proper wall support.Allow even spacing between shelves
Consistent spacing creates visual order. Uneven gaps draw attention to the shelves for the wrong reason.Size the shelf length correctly to the space
Shelf length should relate to what sits below or beside it. It is a common mistake to choose shelves that are too short. These feel accidental and look even smaller than they are when hung on the wall.Match shelf material to bathroom materials
Shelves should connect visually to the vanity or surrounding finishes. Using the same material or a complementary finish to tie the shelf into the cabinet design.Choose a practical shelf depth
Most floating bathroom shelves perform well between 8 and 12 inches deep. This supports towels, containers, and daily items. Shallower shelves can be used for artwork or small products.Anchor shelves properly
Shelves must be secured into studs, blocking, or rated anchors. The weight of towels and decorations can be enough for a shelf to fall if it isn’t properly secured. Proper support also keeps shelves level over time.Add proportional storage and decor items
Use containers, folded towels, and a limited number of objects. Group items by height and leave open space. This keeps floating bathroom shelves functional and easy to use.
Don’ts for Floating Bathroom Shelves
Add shelves without purpose
Every shelf should serve storage, balance, or both. Shelves added only to fill a wall often create clutter rather than function.Use materials not suited for moisture
Unsealed wood and untreated surfaces do not hold up in bathrooms. Floating bathroom shelves must be sealed on all sides to handle heat and humidity.Overload shelves visually
When shelves feel crowded, the bathroom feels smaller. You can avoid this by choosing similar items (e.g. all the same color of towel) or by limiting the number of decorations (e.g. using groups of 3).Ignore alignment with other elements
Floating bathroom shelves should follow the same visual lines already present in the room. Align the shelves with other fixtures. Use room-specific floating shelf spacing as a guide.Add too many or too few shelves for the space
One shelf may feel unfinished. Too many shelves can overwhelm the wall. The right number depends on wall height, shelf length, and how much storage is needed.
Bonus: Adding Lighting to Bathroom Floating Shelves
Lighting can make a big difference in the ambiance of a space. Adding sconces over shelves or integrated shelf lighting creates beautiful mood lighting that highlights the items on the shelf.