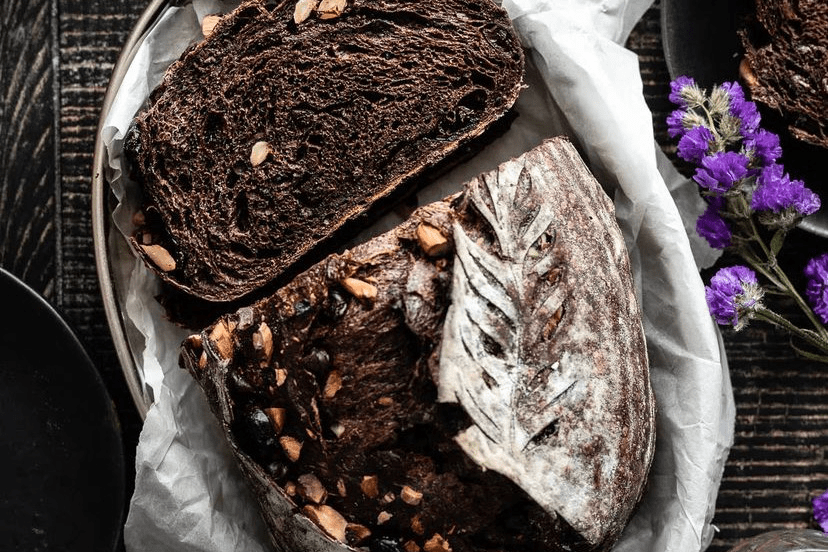
Here’s my recipe for chocolate sourdough bread, it isn’t a traditional Christmas recipe, but I usually make it during the holidays because it takes a bit more effort and time. This chocolate sourdough is a sweeter bread, great to have toasted with butter or on it’s own. It’s very delicious and always a hit at holiday gatherings!
Ingredients for Chocolate Sourdough Bread
• 250 g unbleached all purpose
• 100 g freshly ground whole wheat
• 125 g bread flour (can omit and just add more to the unbleached all purpose)
• 10 g salt
• 50 g brown sugar
• 50 g cocoa powder
• 100 g mature starter (active and bubbly)
• 335 g water
• 125 g chocolate chips
Instructions
1. Feed a sourdough starter 4-12 hours before with sufficient flour and water. The starter should be super active and bubbly before starting the dough.
2. In a large bowl, weigh out dry ingredients (except salt). Mix well.
3. Add warm water and sourdough starter. Combine and allow to rest for 30 minutes.
4. Sprinkle salt over top.
5. With your hands, mix the dough for about 5 minutes until the dough comes together.
6. Cover with damp towel or plastic wrap.
7. Let rest for 30 minutes.
8. Add in chocolate chips and start the stretch and fold.
9. Take the dough in the bowl and grab the edge firmly. Pull up, stretching it upwards. Then push the dough into the center. Turn the bowl about a quarter turn and do this stretch and fold again, repeating two more times.
10. Every 15 minutes, do this stretch and fold technique. You’re looking for a total of three times.
11. Every 30 minutes, do another stretch and fold – 3 times.
12. Cover and allow the dough to bulk-ferment until doubled. The timing will vary depending on a lot of factors; temperature of your home, how active and mature your starter is, etc. I usually make this dough in the morning and allow it to rise all day.
13. Shape. Spin dough and pull it toward you multiple times until a ball forms.
14. Leave the dough out for 15-20 minutes uncovered so a skin can develop on the surface of the dough.
15. Turn the dough onto a clean surface and shape by folding the two sides over to the middle, repeating on the other two sides.
16. Place the dough into a floured banneton or bowl lined with a tea towel, seam side up.
17. Second rise for one hour at room temperature or cover with plastic and proof 12-15 hours in refrigerator.
18. Preheat Dutch oven to 425 degrees for 1 hour.
19. After the Dutch oven has preheated, remove dough from the fridge.
20. Dust dough with flour on top. Optional.
21. Score design with a razor.
22. Bake for 20 minutes with the lid on.
23. Remove the lid and bake for another 30 minutes.
24. Allow to cool completely before slicing.
12 DAYS OF DECOR CHRISTMAS RECIPES
We are featuring 12 recipes that are holiday favourites from Decor Cabinets staff. Check out all the recipes on the blog.